Free shipping on all orders within Singapore

Last updated: 01/07/2019
This article is the second in a series of growing Lavender in tropical Singapore. The first part on care and propagation is available here.
So you've been growing your lavender for awhile, and maybe the roots are now getting a little old and tired-looking. But what can you do if you want to keep the plant healthy?
Here's a useful bonsai technique called root pruning that is useful for stimulating the growth of new feeder roots when older ones are damaged due to infection or drying out. It also keeps plants to a manageable size and maintains the vigour of the roots. Because vigorous roots means healthy plants!
1. Identifying healthy roots

▲ (A) Healthy roots, (B) Dead or diseased roots, (C) First cut line, and (D) Second cut line
Begin by finding out where most of the healthy roots are and where you want to trim the roots. Healthy roots and unhealthy, diseased or dead roots can be distinguished easily by their colour and structure. Healthy roots are white or pale coloured, firm and sometimes covered in root hairs (A), while roots that aren't are dark or black, slimy due to bacterial growth and decomposition, and are easily detached from the rest of the root mass (B) by pulling on them.
Poor root health is usually caused by using insufficiently diluted nutrient solution, allowing the roots to dry up or pathogen infection from other sources. For this reason, it is important to observe good hygiene when preparing the nutrient solution or trimming the roots. All equipment should be washed with detergent and rinsed before use. Remember that mediterranean herbs such as lavender, rosemary and thyme thrive in nutrient poor substrates, and too much nutrients is detrimental to the plants. They should be grown in a solution with an EC of between 1.0 to 1.5, but if testing equipment is not available use 25% to 50% of the manufacturer's recommended dilution. Less is definitely more in this case!
2. Trimming the roots
Once the extent of the root damage has been determined, it's time to muster up some courage and make the cut! It's important to remove as much of the dead roots as possible to prevent any spread of rot, so cutting back into the healthy white roots is recommended, such as at the cut line at (C).
However, cutting back to (C) would still leave a fairly large fibrous mass of roots that will in time become wider than the opening of the glass container, so in this case roots were cut at (D) instead.
3. Care after trimming
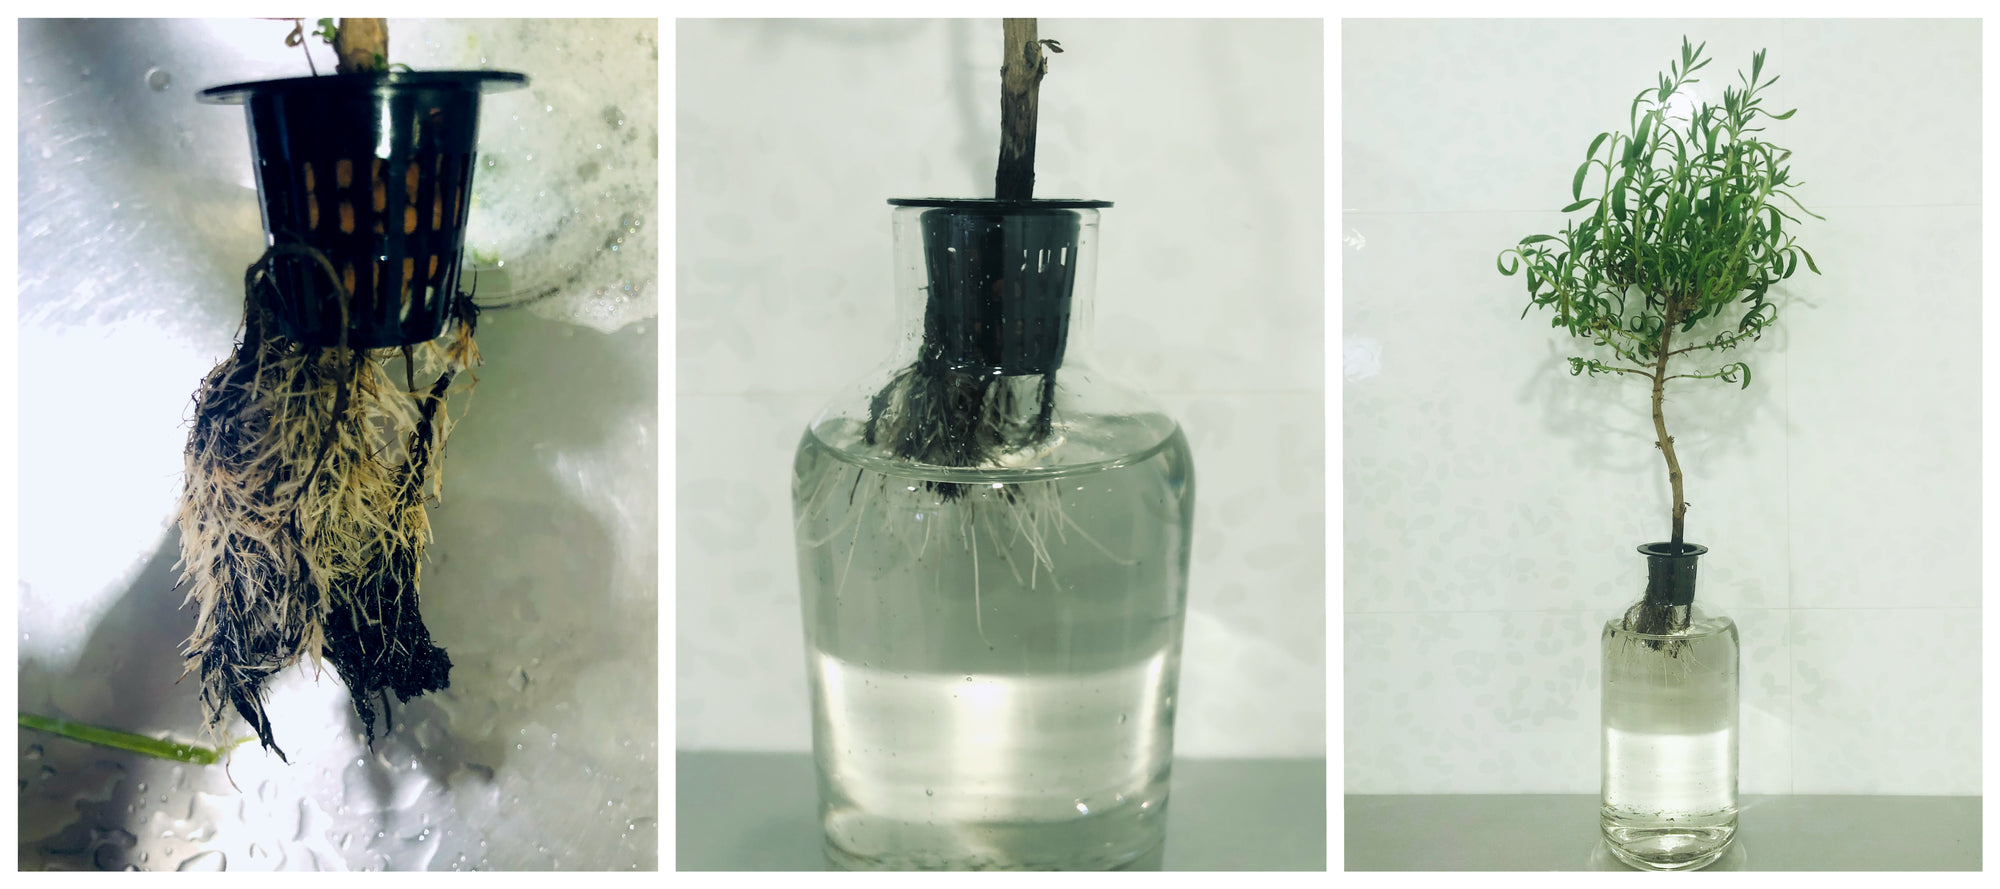
It's a good idea to scrub and wash the plant's container before placing the plant back so that everything is kept as clean as possible. Put the plant back in and fill with water so that the cut root ends have contact with water always. At this point it is not necessary to add nutrients to the water yet. A drop or two of HB101 or PGS1000 can be added to speed the growth of new roots, but it isn't a must if you don't have it.

▲ Fill the water to (B) instead of (A)
Since most of the roots have been removed, it's critical that the remaining roots ends especially the white ones must always be in contact with water (B). Don't fill the water to (A) because that would cause new roots to sprout from there, and once that happens it will be difficult to remove the plant from the bottle.
Cover the bottle with the sock that came it with, and remember to check the water levels daily as the new roots may not grow long fast enough to be always in contact with the liquid in the bottle. Top up with water when necessary. Once roots have grown longer (about 2-3 cm), hydroponic nutrients like HYDRO POWER C can be added to the water at a diluted rate, at 1 ml of fertilizer to 1000 ml of water.
4. Additional tips

▲ Solid lines indicating already pruned stems, dashed lines indicate which stems to prune.
Reducing the foliage by pruning the stems will lower water demand from the plant while the new roots are still growing, reducing plant stress. This is helpful if you are growing the plant outdoors in sunlight where ambient temperatures are higher. For indoors with grow lights, if the temperature doesn't exceed 31°C to 32°C, pruning foliage may not be necessary unless the plant has a lot of stems and leaves.
If the remaining roots start developing a slimy white coating, this probably means that they are infected by bacteria. The liquid in the bottle may start turning dark, and bubbles may form at where the roots were cut. This suggests that fermentation has begun and bacteria is growing, either because more roots are dying or existing dead roots have not been totally removed. Pruning the affected roots, discard all the liquid in the container and wash it throughly before filling up with clean water may help, otherwise if left too long the plant may succumb to the infection.